行动起来,活在当下
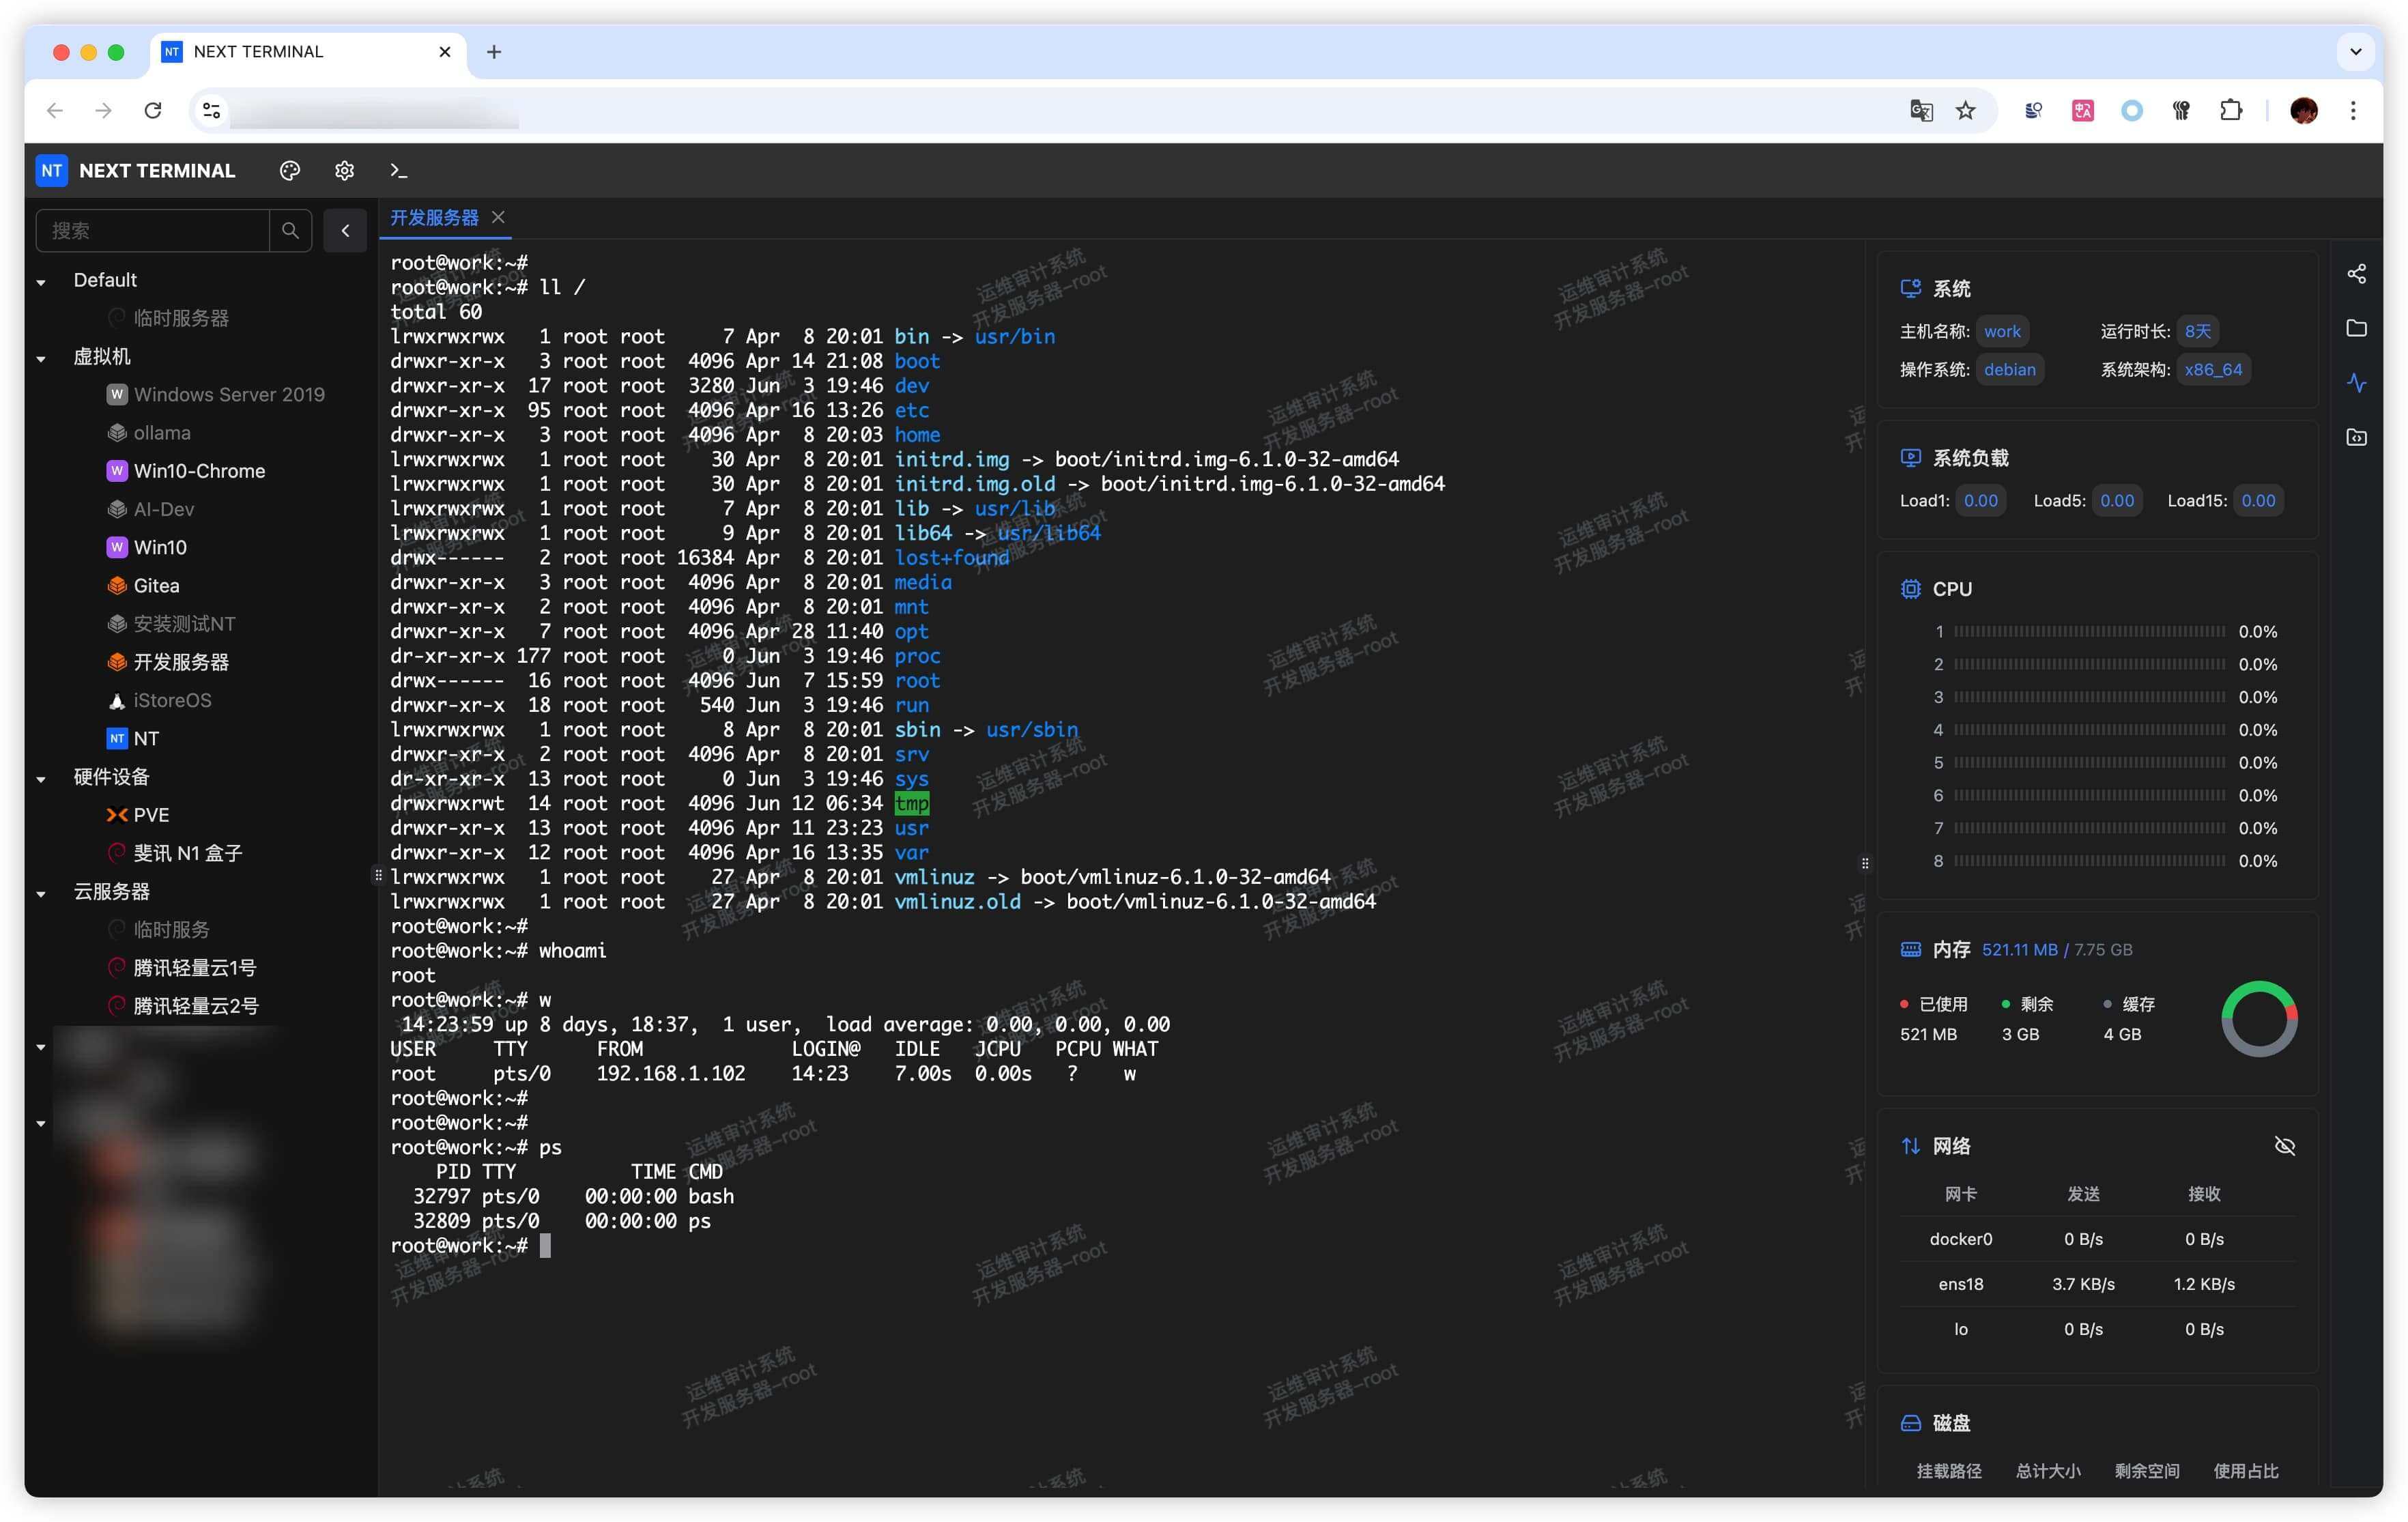
运维人的深夜泪 "凌晨2点,运维小李擦着冷汗盯着屏幕——批量脚本中的一句rm -rf /*误操作,让半个生产环境瘫痪。更崩溃的是,根本查不到谁在什么时候执行了哪些命令..." 如果你也经历过这种 「审计靠人肉、背锅凭运气」 的至暗时刻,今天的推荐将改变你的职业生涯。 一、为什么现在很多都推荐IT审计
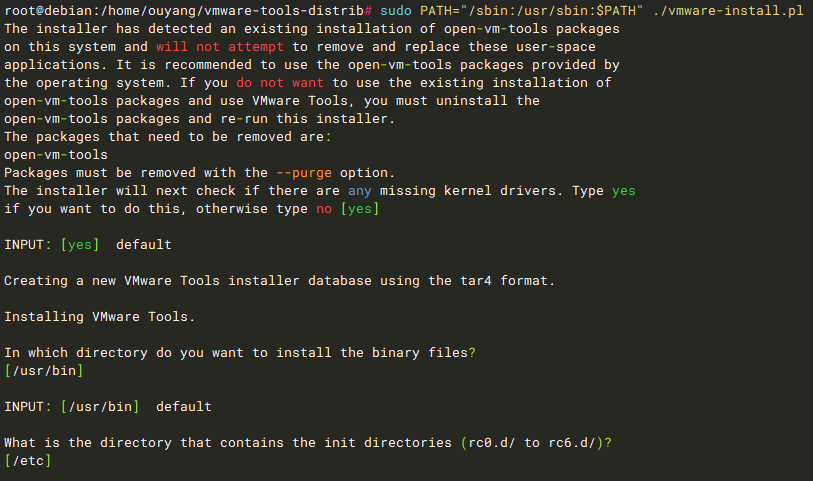
现在VMware Tools 不再随旧版客户机操作系统的 VMware Workstation 一起提供。所以 需要自行下载然后进行安装,中间遇到个问题,记录一下避免下次再次遇到同样问题。 具体问题:Debian13情况下执行vmware-install.pl时提示: Setup is unable
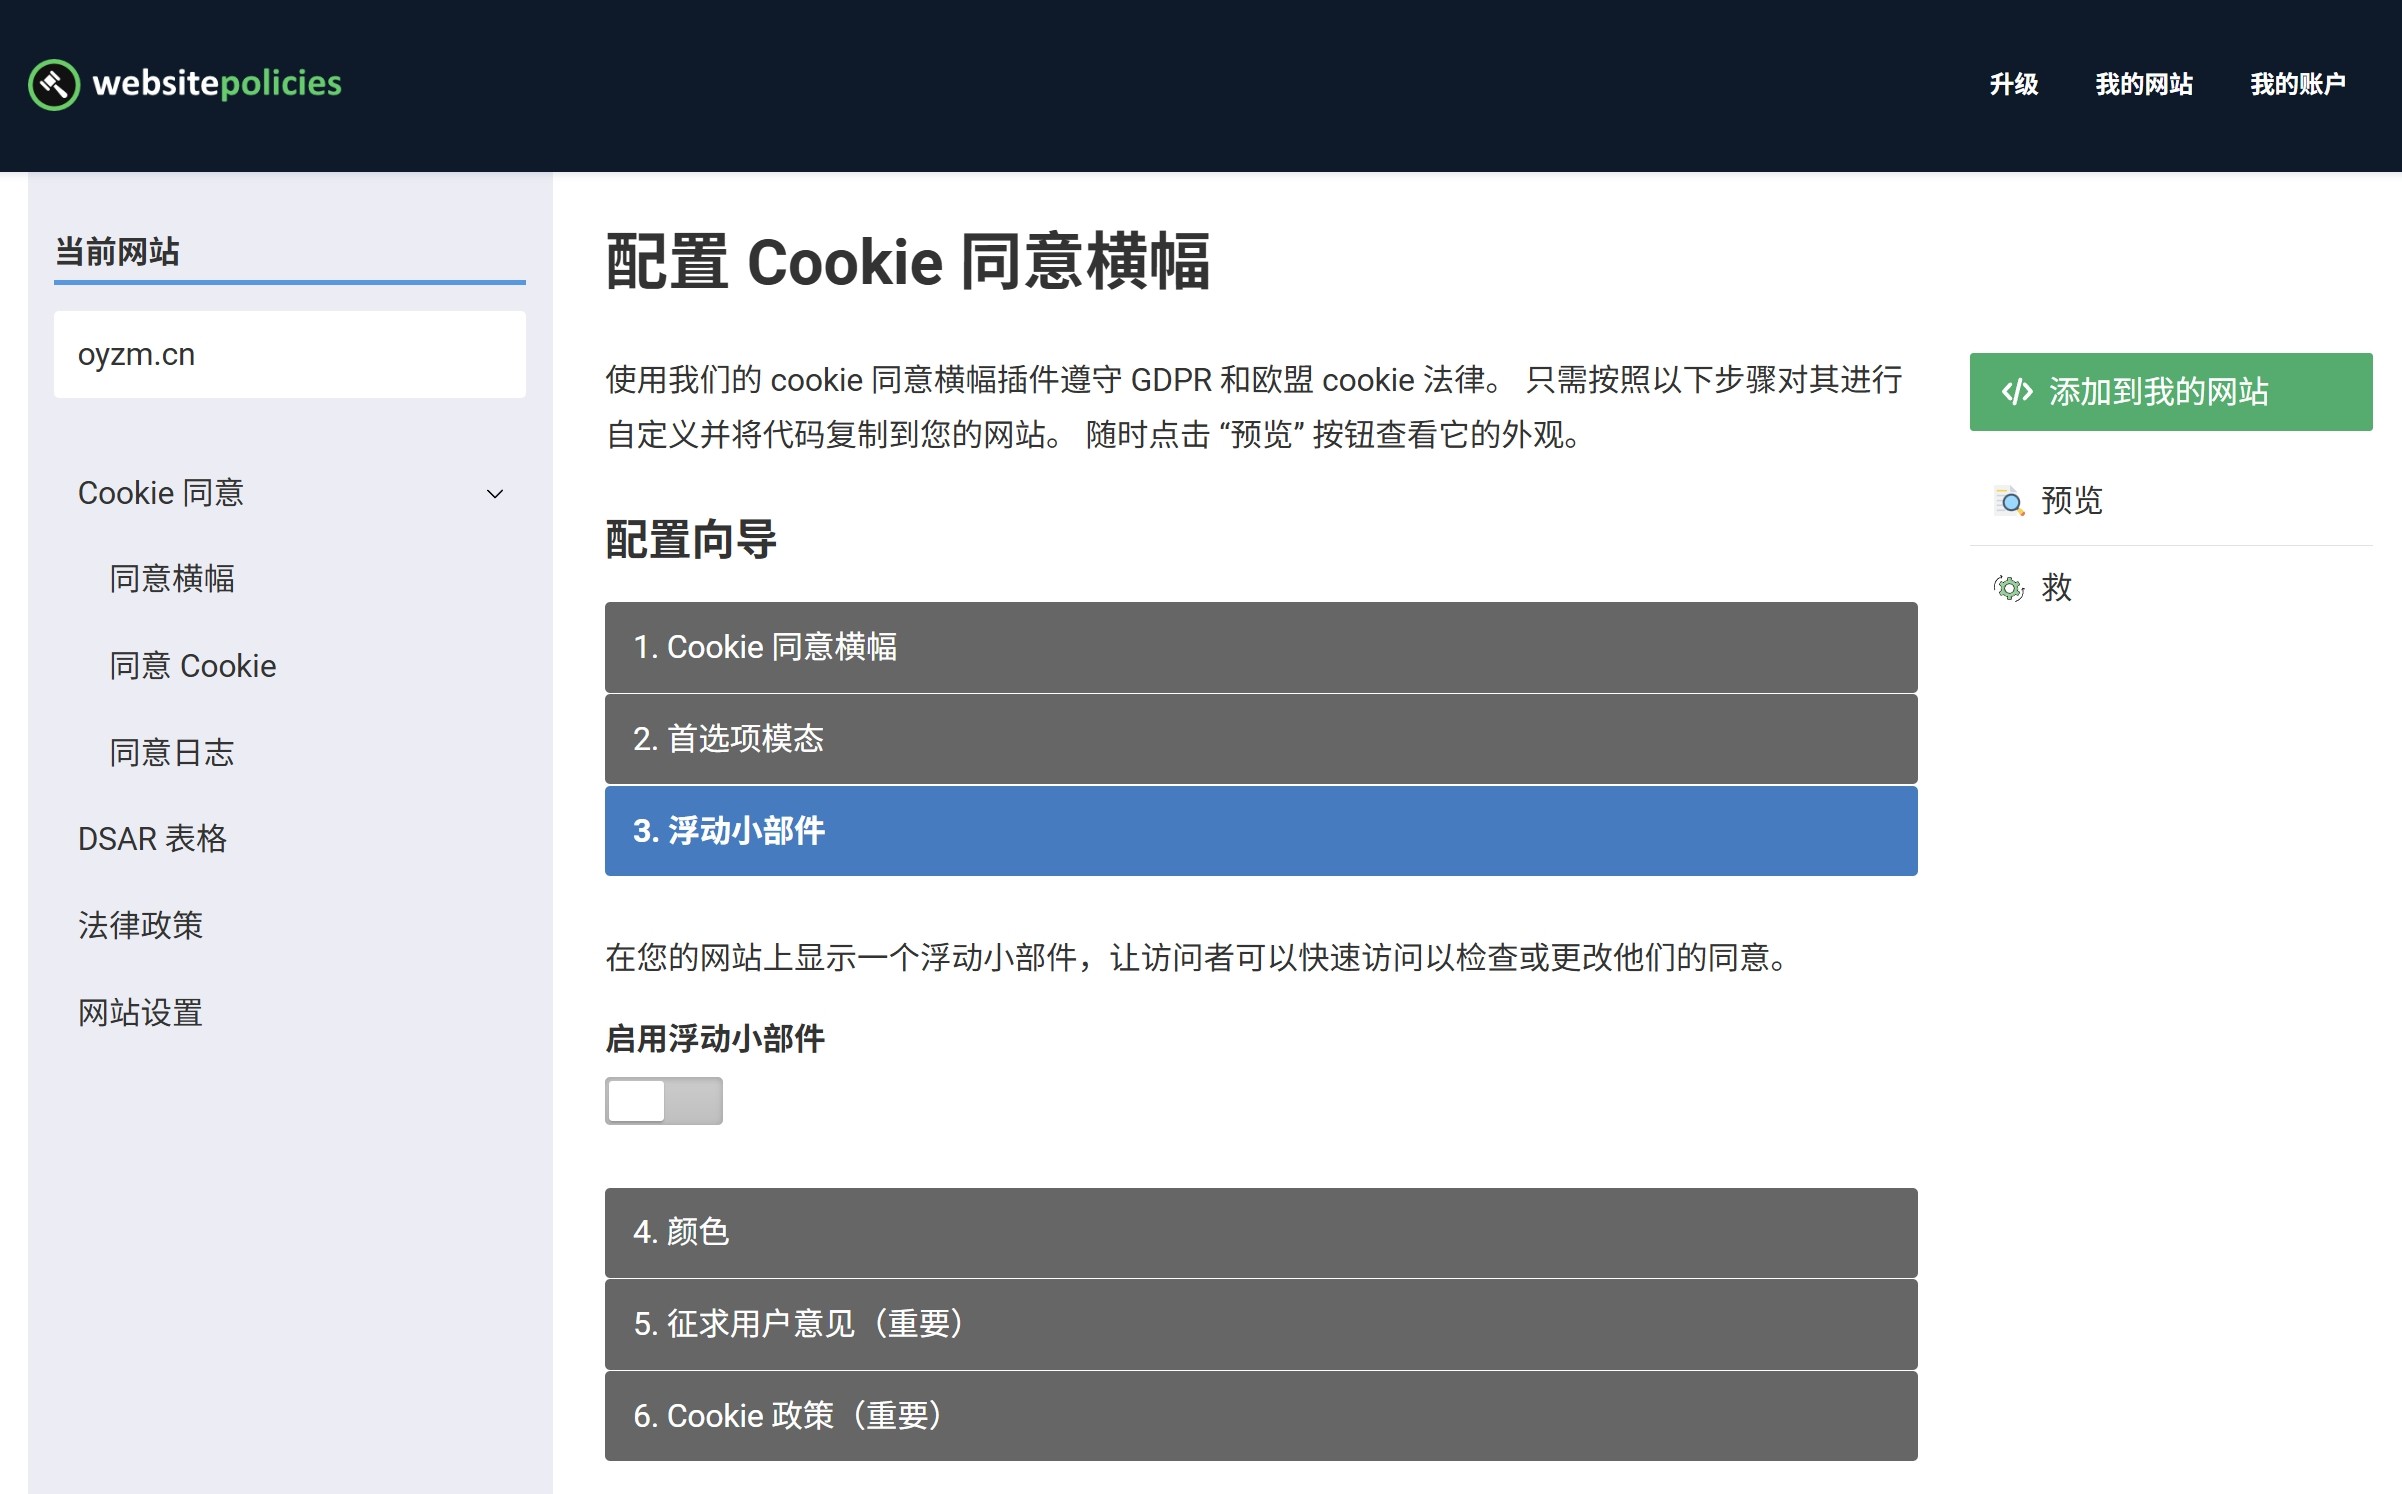
在运营网站或在线业务时,尤其是欧美区域,法律合规性往往是容易被忽视却至关重要的环节。无论是隐私政策、服务条款,还是免责声明,这些文件不仅是法律要求,更是建立用户信任的基础。所以特此推荐一个网站:WebsitePolicies.com ,它通过智能化的文档生成工具,帮助企业和个人在几分钟内创建合规的法